How to Connect Azure SQL Database from SSMS [SQL Server Management Studio]

In previous articles you have already learned how to Create/Activate Microsoft Azure Account and how to Create SQL Server and Database in Azure. 

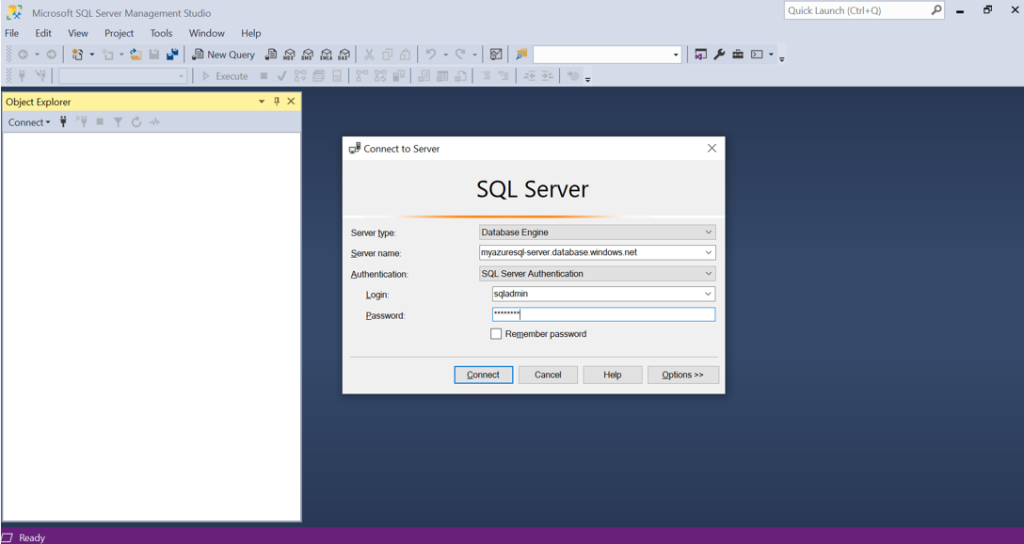
If you have already completed previous two steps, then you may try to connect Azure SQL Database from your SQL Server Management Studio (SSMS) as described below in this article.

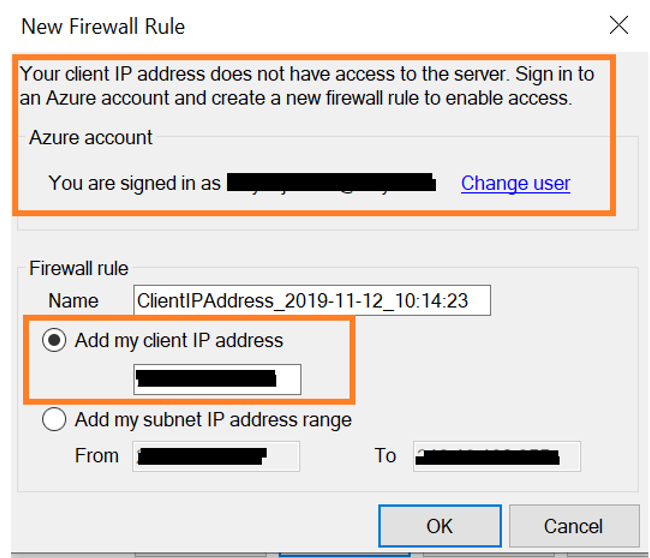
It is very simple to connect your cloud SQL database. The process is exactly similar like you connect traditional SQL server database.

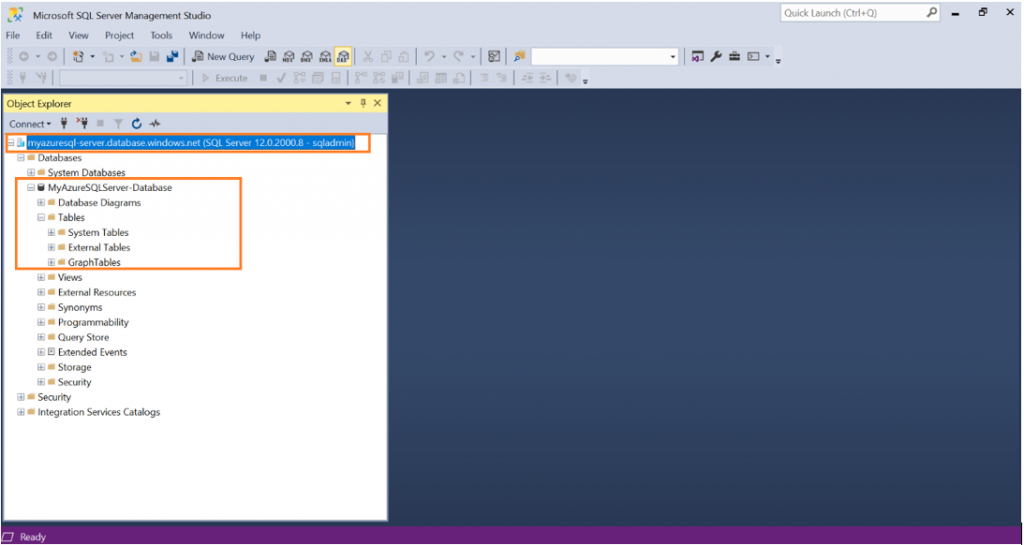
In previous articles, we have already created new SQL server with name “myazuresql-server” and Database name “MyAzureSQLServer-Database”. You may try to connect that SQL server and database from your SQL Server Management Studio.


Management Studio)

  1. Open SQL Server Management Studio
  2. Do selections as follows and Click to Connect.

Server type: Database Engine

Server name: myazuresql-server.database.windows.net

Authentication: SQL Server Authentication

Login: sqladmin

Password: xxxxxxx

Note: If you are not sure about values mentioned above then have a look at our previous articles.

SQL Server Management Studio to connect Azure SQL Database

3. You may have prompted to sign in for your Azure Microsoft Account to set the firewall rule. Click on Sign In and select Firewall rule – Add my client IP address & Click OK

Set Firewall rule to connect SQL Database in Azure


BOOOM!!

Azure SQL server connection from SSMS

Congratulations!!

You have successfully connected Azure SQL Server & database from SQL Server Management Studio (SSMS)


Now your SSMS is ready to fire queries against Azure SQL Server Database. You can easily access Azure SQL databases, tables & views. You can do pretty much same you usually do it with traditional SQL database.

At this stage you only have created the Azure SQL Server and SQL Database. Check out other articles to create sample tables and play more with other Azure SQL database unique features.

Leave a Comment